


Simplifying your sales process can have a huge impact on your business. With a tool like Microsoft Dynamics CRM you can manage your entire sales process from one location. Add Formstack Documents to the process, and you can instantly generate documents like contracts, quotes, proposals, and more.
Today, we’re going to share how you can automatically generate a sales quote when a new opportunity is added to Dynamics CRM.
For this tutorial, you’ll need:
- Microsoft Dynamics CRM account
- Formstack Documents account
- Zapier account
- Formstack Documents API/Secret Key
- Sales Quote template with merge fields.
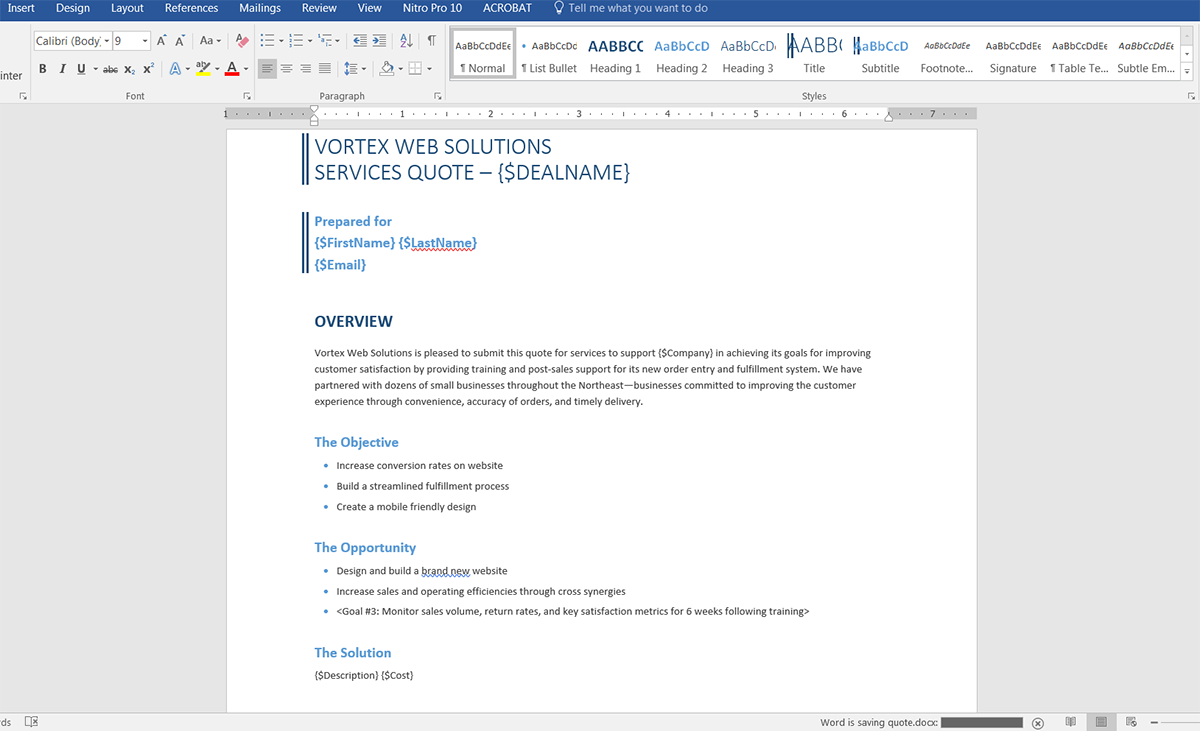
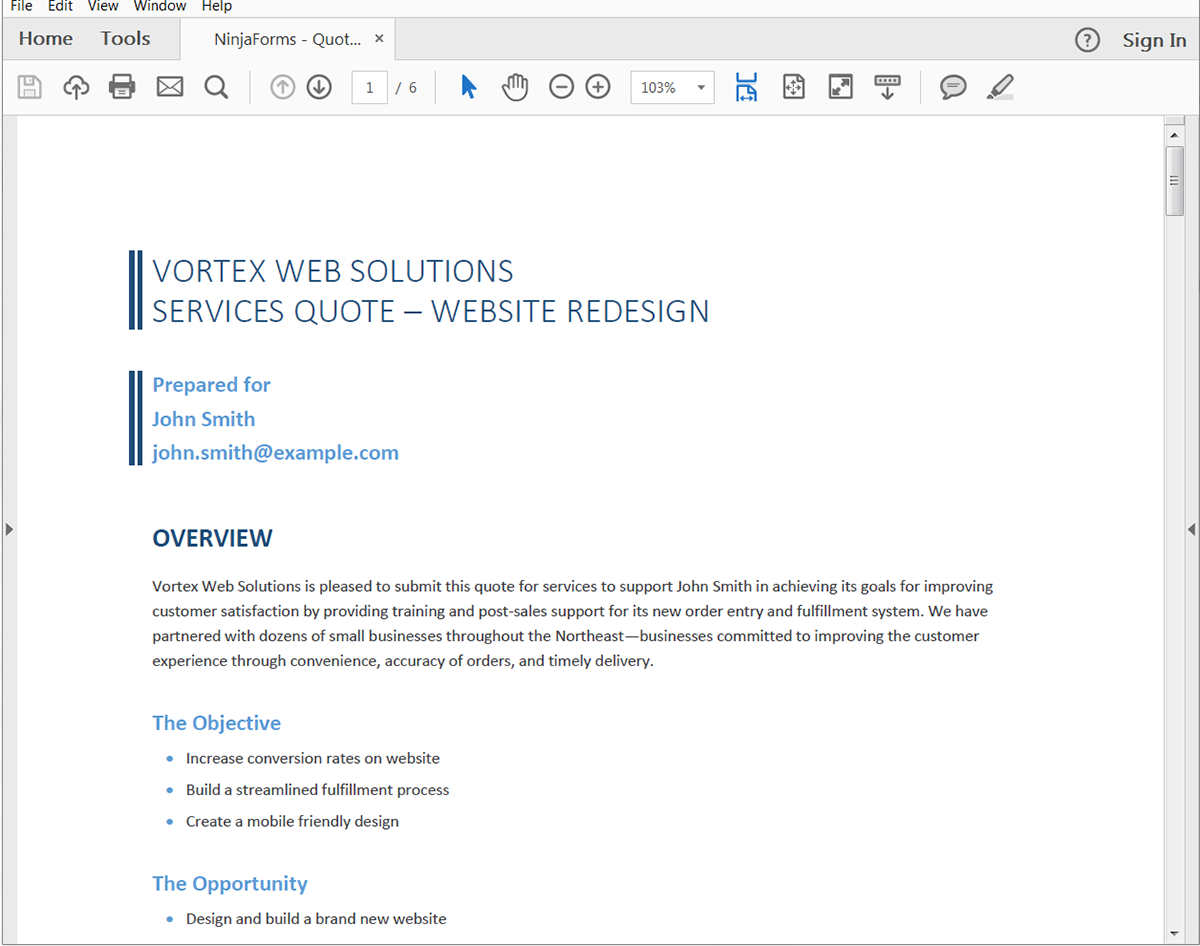
Here’s what our example sales quote template looks like:
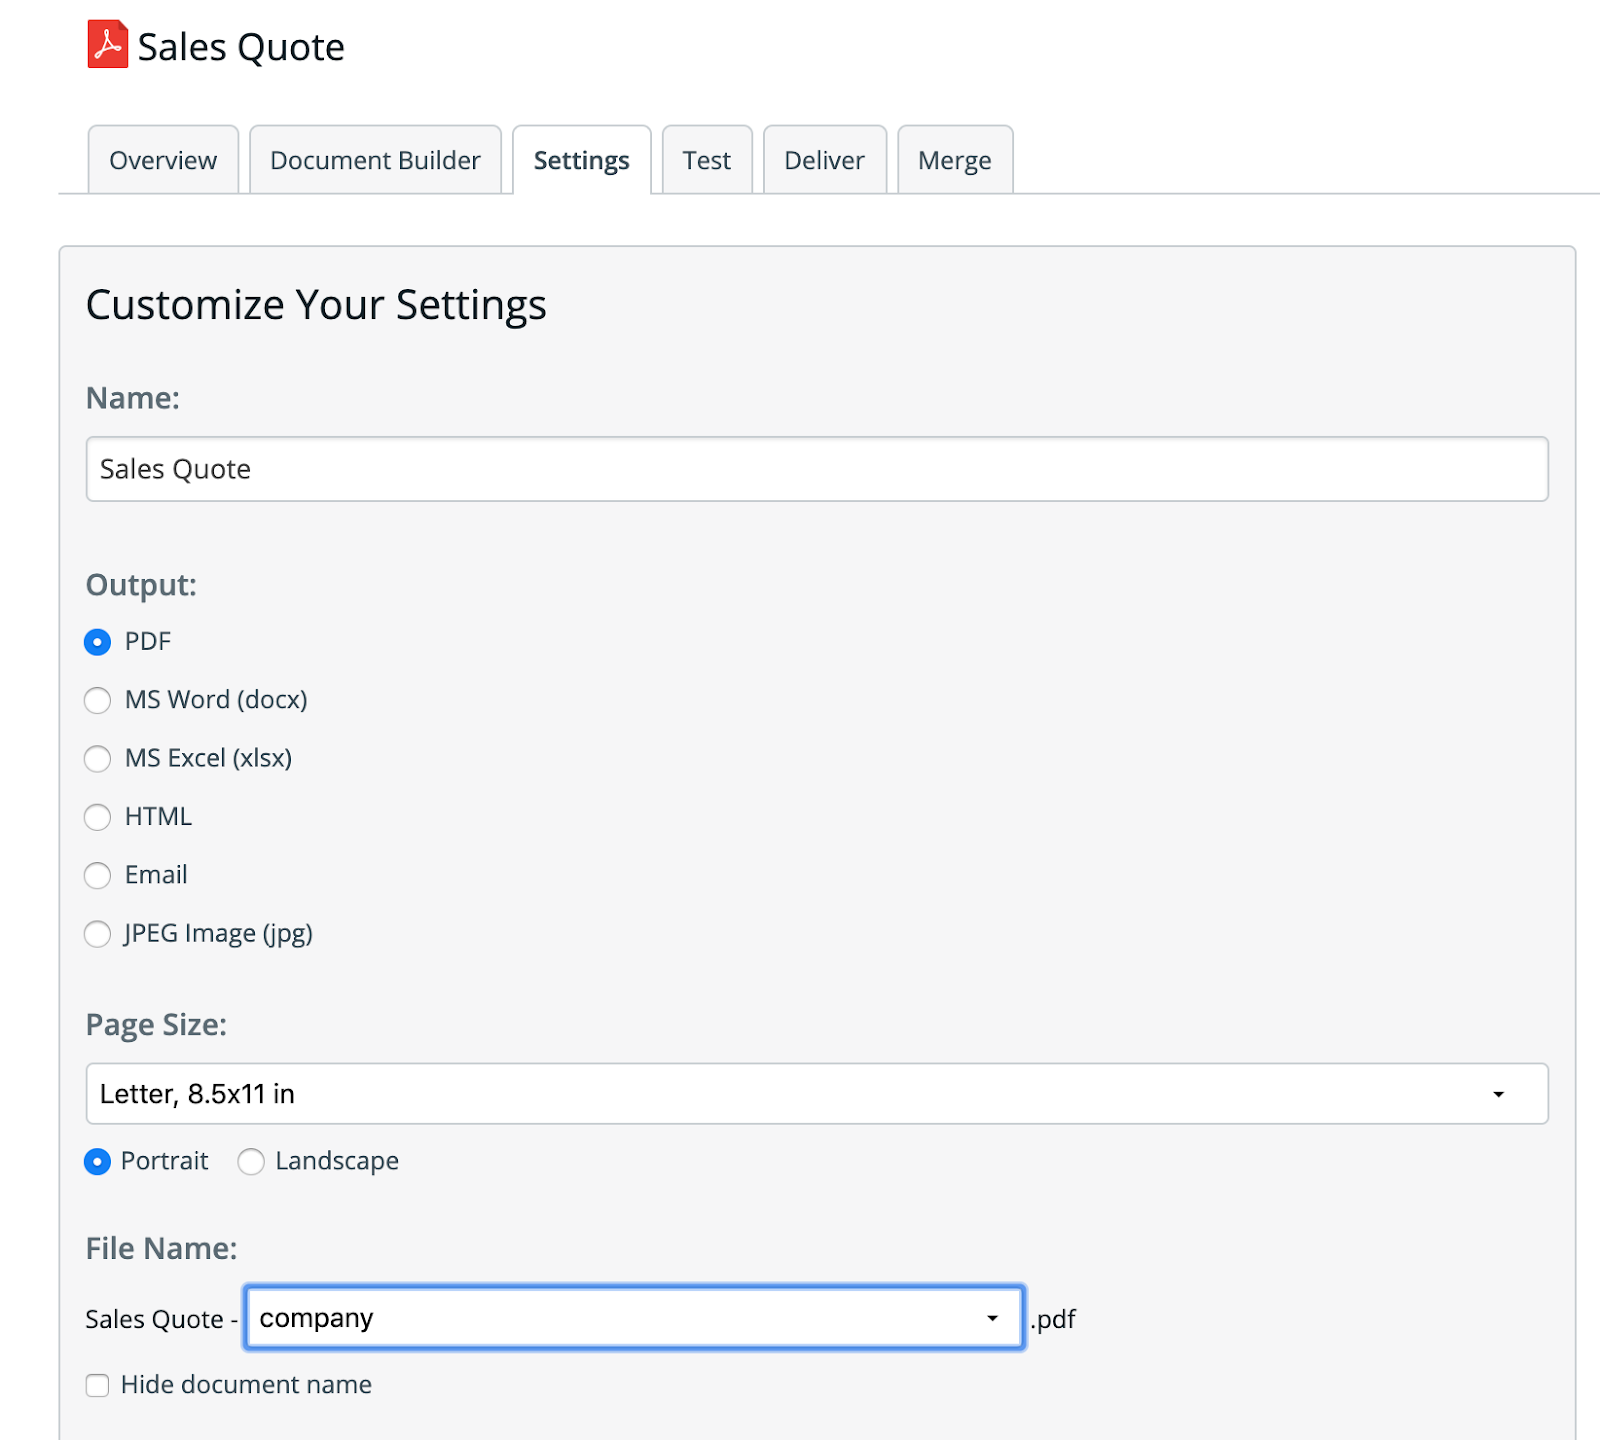
Step 1: Create your delivery.
Once your template is ready, upload it to your Formstack Documents account. After you upload your document, you can modify various options like the type of file that is generated and the name of the file. For this example, we’re going to produce a PDF, and include the company name in the title of our file.
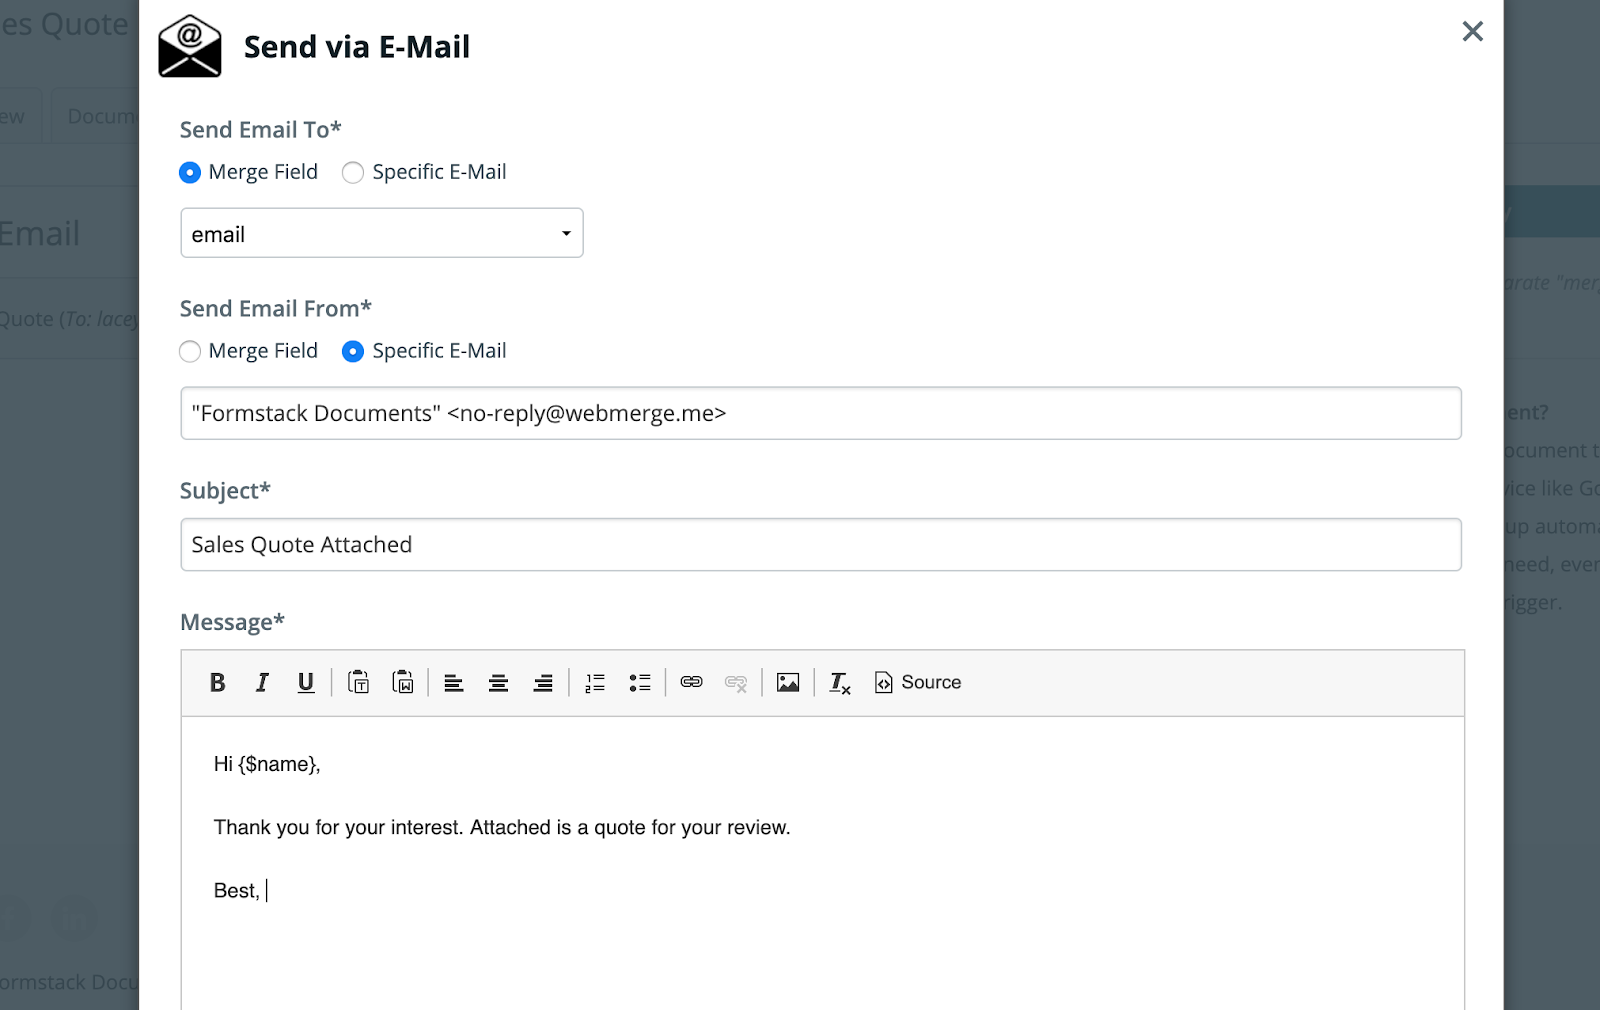
Next, we’re going to set up the delivery of our document so that it is automatically emailed directly to our customer. Under the Deliver tab, select “New Delivery,” and choose email. For the “To” address, we’re going to select the merge field for our customer’s email. See our example email below.
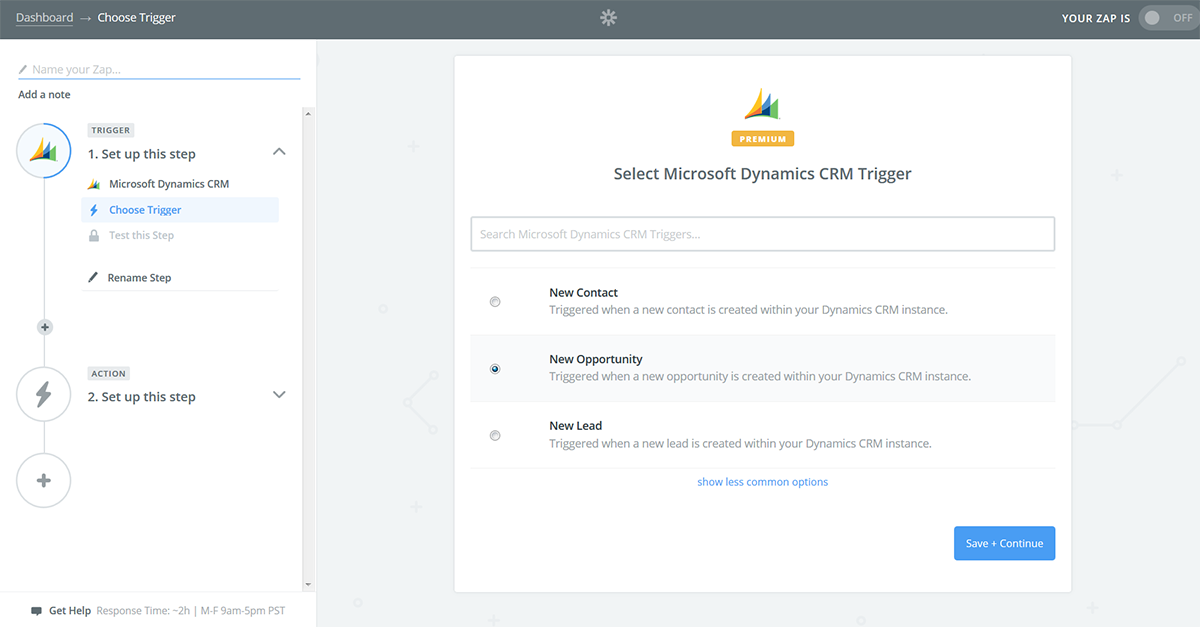
Step 2: Set up your Zap.
Now, we’re done with the setup process inside Formstack Documents, and we’re ready to setup the integration with Dynamics CRM. To help with the integration, we’re going to use Zapier.
Inside Zapier, we’re going to set up a new Zap. For the “Trigger,” we’re going to choose Microsoft Dynamics CRM as the app, then New Opportunity as the trigger.
After you authenticate your Dynamics CRM account, Zapier is going to load a test opportunity to make sure that everything is working correctly. Follow the steps outlined by Zapier and continue.
For the “Action,” we’re going to choose Formstack Documents as the app and “Create Document Merge” as the action.
Step 3: Turn on your Zap.
Once you authenticate your Formstack Documents account, Zapier will load a list of your documents. When you select your sales quote document, Zapier will load all of the merge fields in your document. You’ll need to match each of the merge fields to corresponding fields in Dynamics CRM. This tells Zapier how to send your data to your document.
Once you have all of your merge fields matched up, go ahead and turn on your Zap to run a test! Open up Dynamics CRM, and create a new opportunity. Zapier will detect the new opportunity and send the data over to Formstack Documents where your quote will be generated.
Here's what our merged quote looked like:
Wasn’t that easy? It only takes three steps to start automatically generating documents with Dynamics CRM. If you have additional questions about how you could apply these steps to your business, we’re here to help. Please reach out to us, and we’ll work to address any of your concerns as soon as possible.
If you’re interested in testing out this workflow, you can get started today with a free trial of Formstack Documents.


